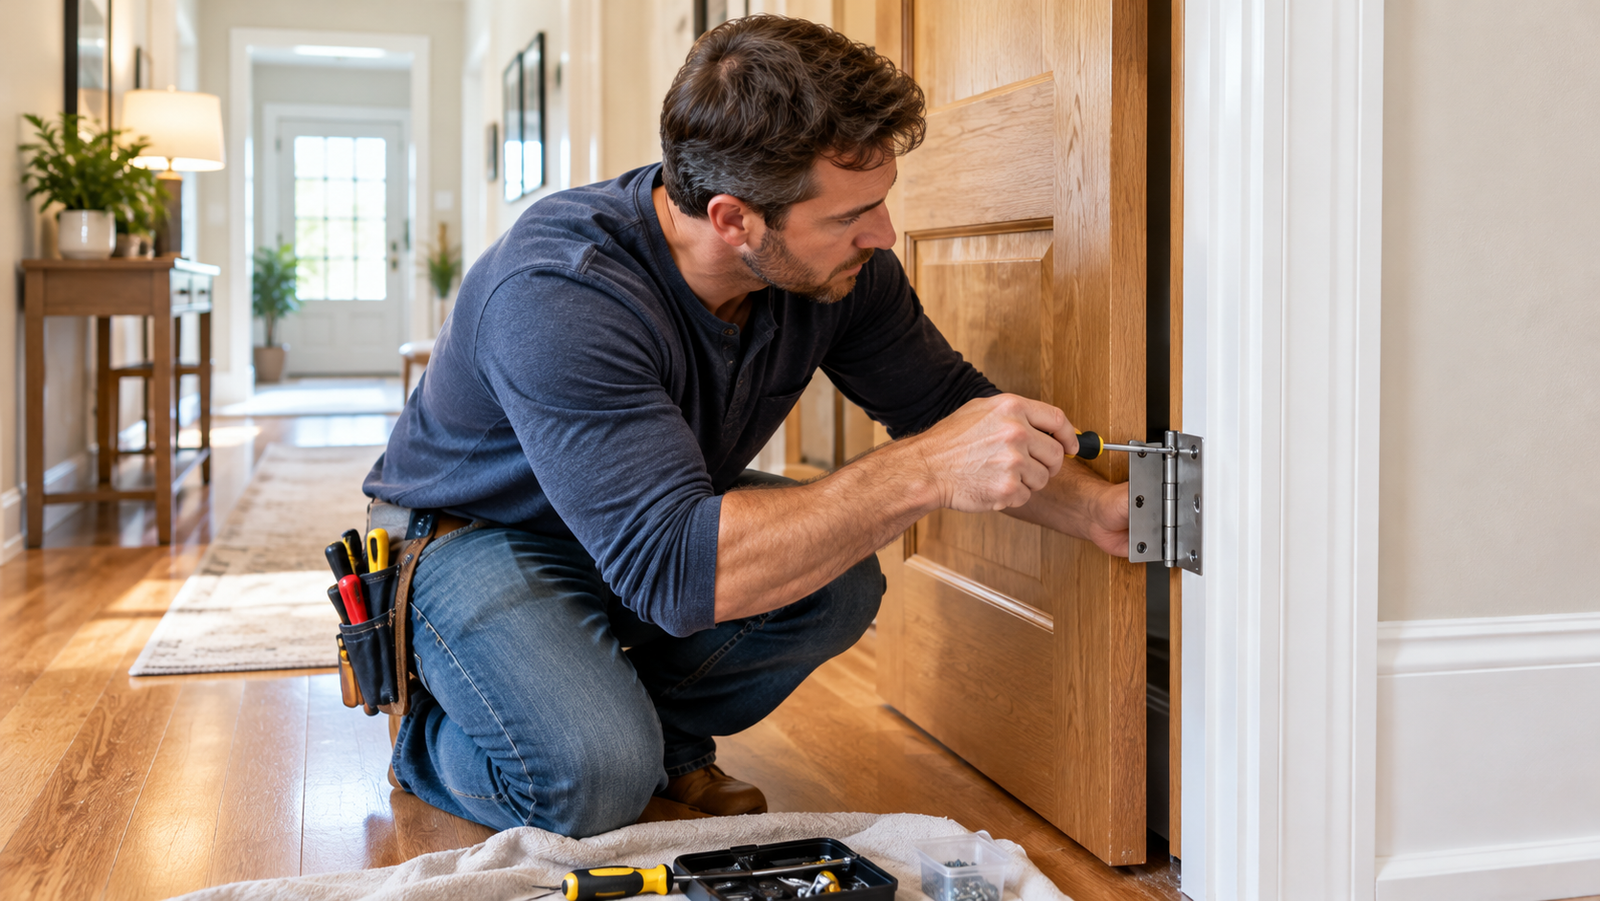
The quickest way to learn how to fix a sagging door is to check the hinges and tighten loose screws; if the holes are stripped, replace short hinge screws with longer 3-inch screws that can grip the wall framing. This simple repair often lifts the door back into alignment, stops rubbing, and helps it close smoothly without replacing the entire door.
A sagging door can be annoying in ways you might not notice at first. Maybe you have to lift the handle to make the latch catch, the top corner rubs against the frame, or the door makes a scraping sound every time you open it. It can feel like a bigger repair than it really is.
In many homes, the problem starts with loose hinge screws or a door that has gradually shifted under its own weight. Fortunately, you can often fix it with a screwdriver, a few suitable screws, and a little patience. More serious cases may require hinge shims, careful trimming, or professional help.
This guide walks you through the common causes, the tools you’ll need, and four practical ways to repair a sagging door. Start with the simplest fix first, and only move to more involved work if the door still doesn’t sit correctly.
Table of Contents
Why Doors Sag
Before you start fixing anything, take a moment to understand why the door has moved. The right repair depends on what’s causing the problem. Tightening screws won’t solve every issue, especially if the frame is damaged or the door itself has swollen.
Loose hinge screws
Loose screws are one of the most common reasons a door begins to sag. Every time the door opens and closes, its weight puts pressure on the hinges. Over time, screws may loosen, particularly if the door is heavy or used frequently.
You might notice a gap that is wider at the top on one side, or the upper corner of the door may drop toward the floor. If the hinge leaves move when you gently test them, loose screws could be the cause.
Stripped screw holes
Sometimes a screw turns without tightening. This usually means the wood around the screw threads has worn away, leaving the screw with little material to grip.
Repeatedly turning the same screw won’t restore the grip. You may need a longer screw that reaches sound framing, a properly fitted wood repair, or a more substantial repair if the surrounding wood is damaged.
Humidity and seasonal swelling
Wood expands when it absorbs moisture and contracts as conditions change. A door that works perfectly in dry weather might rub against the frame during a humid season.
This is different from a door that has dropped on its hinges. If the gaps around the door remain fairly even but the edge rubs in several places, swelling or a change in the frame may be involved.
Heavy doors and worn hinges
Solid-core doors and older timber doors can put considerable weight on their hinges. Small, worn, bent, or poorly installed hinges may struggle to support that load.
A hinge with a loose pin or a bent leaf may also allow the door to move out of alignment. In that situation, adjusting the screws alone may not provide a lasting repair.
A loose or damaged door frame
The hinge screws need a solid surface to hold the door in position. If the frame is cracked, soft, rotten, or separating from the surrounding wall, simply installing longer screws may not be enough.
Look closely at the hinge-side jamb for splitting wood or movement. If the frame itself is shifting, address that issue before trying to adjust the door.
Tools and Materials You’ll Need
Most basic door sagging repairs don’t require a workshop full of tools. Gather what you need before beginning so you can support the door properly and avoid rushing.
Basic tools
- Phillips or flathead screwdriver, depending on the screws
- Drill/driver with suitable bits
- Tape measure
- Pencil
- Level or straightedge
- Utility knife for controlled marking, if needed
- Safety glasses
- Door wedge or wooden shims
- Helper to support a heavy door
Possible repair materials
- Suitable 3-inch hinge screws
- Replacement screws matching the hinge holes
- Thin hinge shims or purpose-made hinge adjustment shims
- Replacement hinges of the correct size and load rating
- Wood filler or wood repair plugs for appropriate repairs
- Sandpaper and paint for a carefully trimmed edge
You won’t need every item for every method. Start by inspecting the door and hinges so you can choose the least invasive repair.
Safety note: Keep your fingers clear of hinge gaps and support the door before removing hinge screws. A heavy door can shift suddenly. Wear eye protection when drilling or planing, and avoid removing multiple hinge screws at once unless the door is safely supported.
Method 1: How to Fix a Sagging Door With Longer Screws
For many doors, this is the best first repair. Longer screws can pass through the hinge and jamb into the structural framing behind it, provided the screw location and wall construction allow that connection.
A 3-inch screw is a common option for suitable wood-framed door openings, but don’t assume it is right for every frame. Confirm that the screw can be installed safely without striking wiring, plumbing, glass, or other hidden components. Use appropriate screws for metal frames or other non-wood construction.
Step 1: Find where the door is sagging
Close the door slowly and look at the gaps around its edges. Check whether the top corner on the latch side sits too low, whether the door rubs against the floor, or whether the latch no longer lines up with the strike plate.
Open the door and inspect the hinges. Look for screws that have backed out, hinges that move, or cracks in the wood surrounding the screw holes.
This quick inspection helps you avoid fixing the wrong problem.
Step 2: Support the door
Open the door enough to work comfortably. Place a door wedge or suitable support beneath it so the door’s weight isn’t pulling down on the hinges while you adjust them.
For a heavy door, ask another person to hold and steady it. Don’t rely on a loose stack of objects that could slip while you’re working.
Step 3: Tighten the existing hinge screws
Use the correct screwdriver or drill bit to tighten loose screws on the hinge leaves. Apply steady pressure and stop when the screw is snug.
Don’t overtighten. Excessive force can strip the wood, damage the screw head, or distort the hinge. Test the door after tightening the screws to see whether the alignment improves.
If the screw spins freely or fails to tighten, move to the next step.
Step 4: Replace a suitable screw with a longer one
Choose a hinge screw that matches the hinge and is long enough to reach sound framing. For a typical wood-framed opening, a 3-inch screw may be appropriate when installed in a suitable hinge hole.
Remove one screw at a time, keeping the hinge attached and the door supported. Install the longer screw carefully, checking that it sits properly and doesn’t pull the hinge out of position.
Don’t force a long screw into a location where you can’t verify that the path is safe. If the jamb is thin, the frame is metal, or hidden services may be nearby, seek a suitable alternative.
Step 5: Test the door
Remove the support carefully and open and close the door several times. Watch the gap at the top and latch side.
If the door now closes without rubbing and the latch meets the strike plate, the repair may be complete. If it still sags, inspect the other hinges and the frame before deciding whether to use shims or another method.
Why this method works: A longer screw may reach more substantial wood behind the jamb, giving the hinge a stronger hold than a short screw secured only in the jamb. It won’t correct every cause of sagging, but it is often a sensible first step.
Method 2: Adjust the Hinges With Shims
If the door still hangs unevenly after the screws are tightened, hinge shims can help correct the position. A shim is a thin piece of material placed behind a hinge leaf to change its angle or position slightly.
This method is useful when the hinge placement or frame alignment needs a small adjustment. The correct location and thickness depend on the pattern of rubbing and the construction of the door.
Step 1: Identify the direction of the adjustment
Look at the door gaps while it is closed. Determine which edge is too close to the frame and where you need additional clearance.
Don’t add shims randomly. A shim changes the hinge’s position, so the wrong placement can make the door rub more severely or create uneven gaps.
Step 2: Support the door and prepare the hinge
Place a secure wedge beneath the door or have someone support its weight. Remove only the necessary hinge screws and keep the hinge leaf under control.
For a light interior door, a small adjustment may be manageable by one person. A heavy solid-core or exterior door should be handled with assistance.
Step 3: Fit a suitable shim
Use a purpose-made hinge shim or another suitable, stable material designed for the application. Place it behind the hinge leaf according to the adjustment required.
Keep the shim flat and make sure it doesn’t interfere with the hinge’s movement or prevent the hinge leaf from sitting securely. Avoid improvised materials that crush, slip, or deteriorate.
Step 4: Refasten and inspect
Reinstall the screws and tighten them evenly without overtightening. Remove the support carefully and check the door’s position.
Open and close it slowly. If the gap has improved, the adjustment may be successful. If the door has become harder to close or now rubs elsewhere, remove or reposition the shim rather than forcing the door.
Step 5: Make small changes
Door alignment is sensitive to small adjustments. If the first shim doesn’t help enough, reassess the gap before changing anything else.
For a door with multiple hinges, consider how the hinges work together. A large adjustment at one hinge can twist the door or put extra stress on another hinge. If the frame is badly out of square, a shim alone may not solve the issue.
Method 3: Plane the Door Edge if It Rubs
Sometimes the door doesn’t sag at all. Instead, it expands, the frame shifts, or a particular edge catches as the door moves. If the door is correctly supported and aligned but still rubs in a specific place, carefully trimming the edge may be an option.
Planing should not be your first move. Removing wood won’t repair loose hinges, stripped screw holes, or a moving frame. Diagnose the underlying problem before taking material off the door.
Step 1: Confirm where the door catches
Close the door slowly and identify the exact contact point. Look for scuff marks or rubbed paint that show where the door meets the frame.
Check the gaps at the top, bottom, hinge side, and latch side. If the gap is uneven because the door has dropped, repair the hinges first.
Step 2: Mark the area to trim
Use a pencil to mark the point where the door rubs. If necessary, use a straightedge to understand the shape of the contact area.
Be conservative. You should remove only the amount of material needed to restore suitable clearance, allowing for seasonal changes where appropriate.
Step 3: Remove the door only if you can do so safely
A hand plane or power planer can remove wood, but using either tool requires control and care. If you need to take the door off its hinges, support it securely and get help with a heavy door.
Wear eye protection and follow the tool manufacturer’s safety instructions. Keep hands away from cutting surfaces and secure the workpiece before trimming.
Step 4: Plane in controlled passes
Use light, even passes and check your progress regularly. Avoid removing too much material in one go.
Some doors have veneer, engineered cores, or fire-rated construction that may not tolerate trimming. Exterior doors also need proper weather sealing after edge work. If you’re unsure what the door is made from or how much can safely be removed, ask a qualified carpenter.
Step 5: Seal and finish the edge
After trimming, smooth the edge and apply a suitable finish or sealant where needed. This is especially important for wood doors exposed to moisture.
Rehang the door, tighten the hinges, and test its movement. If the door still catches, recheck its alignment rather than removing more material immediately.
Remember: Planing is for a door edge that needs clearance, not a substitute for repairing a sagging hinge or damaged frame.
Method 4: When to Replace the Hinges
Hinges don’t last forever. If a hinge is bent, badly worn, cracked, corroded, or has a loose pin that can’t be secured, replacement may be the best option.
Signs that hinges need replacing
Look for these warning signs:
- A hinge leaf is bent or visibly damaged.
- The hinge pin moves excessively or won’t stay in place.
- The hinge makes persistent grinding noises.
- Screw holes are damaged beyond a straightforward repair.
- The door is too heavy for the existing hinges.
- Tightening screws and correcting the alignment don’t resolve the sagging.
Step 1: Choose suitable replacement hinges
Match the hinge dimensions, corner style, screw-hole pattern, finish, and intended use. Heavy doors may require hinges with a higher load rating or a different number of hinges, following the door and hardware manufacturer’s guidance.
Exterior doors and fire-rated doors may require specific hardware. Don’t replace their hinges with an arbitrary set from the hardware aisle.
Step 2: Support the door
Before removing a hinge, wedge or otherwise support the door so its weight can’t pull on the remaining hinges. For a heavy door, have another person help.
Remove and replace one hinge at a time when practical, keeping the door stable and aligned. If the door must be removed, use an appropriate safe lifting method.
Step 3: Install and align the new hinge
Position the replacement hinge in the existing mortise if it matches the original hardware. Use suitable screws and tighten them carefully.
If the new hinge doesn’t fit the recess or the screw holes don’t align, don’t force it. A poor fit can leave the hinge loose or cause the door to bind.
Step 4: Test before finishing
Open and close the door several times. Check that it swings freely, remains level enough for proper operation, and latches without lifting or pushing hard.
If the hinges are secure but the door still hangs unevenly, the frame, door dimensions, or installation may need further attention.
How to Check Your Repair
Once you’ve tightened screws, fitted shims, or replaced hardware, take a few minutes to test the result. A door that closes once isn’t necessarily fixed.
Check the gaps around the door
Close the door and inspect the clearance along the top and sides. The gaps should look reasonably consistent for the door and frame design.
Look for a top corner that still droops, a bottom edge that scrapes, or a latch side that presses hard against the jamb.
Test the latch and handle
Open and close the door slowly. The latch should line up with the strike plate and engage without requiring you to lift the handle or push hard on the door.
If the latch still misses, inspect both the alignment and the strike plate. Avoid moving the strike plate before confirming that the door itself is hanging correctly.
Open the door through its full swing
Move the door slowly through its normal range. Listen for scraping, grinding, or clicking. Watch for hinge movement and check that the door doesn’t suddenly shift.
A small amount of normal hinge sound may not indicate a fault, but visible movement or renewed sagging suggests that the underlying issue remains.
Recheck the screws after use
After several days of normal use, inspect the hinge screws again. They should remain snug, and the door should continue to move smoothly.
If the problem returns quickly, don’t keep tightening the same stripped hole. The hinge may need a more durable repair or the frame may need professional attention.
Preventing Door Sag in the Future
A little maintenance can help prevent a small alignment issue from becoming a bigger repair.
Inspect hinges regularly
Every few months, check for loose screws, bent hinges, or visible movement around the hinge leaves. Pay extra attention to heavy doors and doors that are used many times a day.
Fixing a loose screw early is usually easier than repairing a damaged screw hole later.
Avoid hanging excessive weight on doors
Heavy over-door storage, hooks loaded with bags, or other added weight can place extra stress on hinges. Use storage solutions that are designed for the load and the door construction.
Keep moisture under control
Use bathroom ventilation and address leaks near door frames. If a wood door begins sticking during humid weather, monitor whether the problem changes as conditions improve.
Don’t plane the door immediately if seasonal swelling may be responsible. First confirm that the hinges and frame are secure.
Use appropriate hardware
A heavy door needs hinges suited to its weight and dimensions. When replacing hardware, follow the door and hinge manufacturer’s recommendations rather than assuming all hinges are interchangeable.
Don’t force a sticking door
Repeatedly pushing or pulling a door that catches can loosen screws and damage the latch or frame. Find the source of the resistance and correct it before the problem gets worse.
When to Call a Professional
Many interior door repairs are manageable for a careful beginner. However, some problems require a carpenter, door installer, or other qualified professional.
Call for help if:
- The door frame is cracked, rotten, or separating from the wall.
- The door is very heavy, oversized, or difficult to support safely.
- The door is fire-rated or part of a required fire separation.
- The door is an exterior security door with specialized hardware.
- You suspect hidden wiring or plumbing where longer screws would go.
- The hinges keep loosening despite a proper repair.
- The door or frame appears significantly warped or out of square.
- You are not comfortable using a drill, plane, or other tools safely.
A professional can determine whether the problem is caused by the hinges, frame, door dimensions, or the structure around the opening. That can save you from repeatedly trying repairs that don’t address the actual cause.
Frequently Asked Questions
1. How to fix a sagging door quickly?
Start by inspecting and tightening the hinge screws. If a screw spins without gripping, a suitable longer screw that reaches sound framing may help. Support the door while working and make sure the screw can be installed safely. If the door still sags, check for damaged hinges or a loose frame.
2. Can 3-inch screws fix a sagging door?
They can help in many wood-framed door openings because they may reach the structural framing behind the jamb. However, 3-inch screws are not suitable for every frame or every hinge hole. Check the construction and make sure there are no hidden services in the screw path before installing them.
3. How do I fix a sagging door with stripped screw holes?
First, support the door and remove the loose screw. If the hole is in a suitable wood-framed opening, a correctly sized longer screw may reach sound material behind the damaged area. Otherwise, the hole may need a proper wood repair or the hinge may need to be relocated by someone experienced with door repairs.
4. Why does my door sag again after I tighten the hinges?
The screw holes may be stripped, the hinges may be worn or undersized, or the door frame may be moving. A heavy door can also put more stress on hardware than it was designed to handle. Inspect the surrounding wood and hinges rather than repeatedly tightening a screw that won’t hold.
5. Should I plane a door that sticks at the top?
Not before checking the hinges and frame. A door that has dropped may rub at the top because its alignment has changed. Fix the underlying sag first, then consider careful trimming only if the door remains too tight and you have confirmed that the edge needs additional clearance.
6. How much does it cost to fix a sagging door?
The cost depends on the cause and your location. Tightening screws may cost nothing if you already have the tools, while new hinges, repair materials, or professional labor add to the expense. Frame repairs and specialized exterior or fire-rated doors can cost more. Inspect the door before buying parts or requesting a quote.
Conclusion: Fix a Sagging Door Without Replacing It
Learning how to fix a sagging door starts with a simple inspection. In many cases, loose hinge screws are the main problem, and tightening them or installing suitable longer screws can restore the door’s alignment. If that doesn’t work, hinge shims, replacement hinges, or careful edge trimming may be appropriate, depending on what you find.
The most important thing is to fix the cause rather than simply treating the symptom. A damaged frame, worn hinge, or swollen door needs a different solution from a loose screw. Work slowly, support the door while making adjustments, and test it after every change.
For a typical interior door, start with the screws before moving on to more complicated repairs. You’ll often save time, avoid unnecessary expense, and get that satisfying feeling when the door finally closes smoothly again.
About the Author